Email Backup and Recovery
Posted by Nishi on 22 November 2022
Email Backup
Email backup processes and stores emails in a safe, centralized location that can be retrieved at any point in time. It helps prevent data loss by enabling users to restore email content that has been accidentally deleted or lost.
Backups keep your email messages available for longer and make tracking down lost emails much quicker.
Does your organization require an email backup?
Email often contains highly valuable business information and so it is important to make sure your business has the right secure email solutions to recover its critical data.
Having proactive data backup in place can add additional security for your business and allow you to handle any unforeseen data loss situations, keeping your users productive and your organization's data and reputation safe. And as backup emails are stored in a central location, it mitigates the risk of email loss and saves time, money, and manpower that can be required when your IT team is forced to search for an important email.
Enabling email backup
Zoho Mail provides Email Backup solution to secure important email communication from accidental deletion by the employees. Email Backup retains the deleted emails of the employees in the Backup portal. The administrator can recover them from the backup portal back to the employee's accounts.
Steps to enabling backup:
-
Log in to your Admin account at https://ediscovery.zoho.com
-
Click Backup.
-
The Backup portal welcomes you with a small intro to Backup.
-
Click the Enable Backup button to enable Backup for your organization.

Defining default backup policy
The default backup policy defines the period for which the organization's data should be retained in the Backup portal. The default value is 365 days but the organization can either define a specific period in terms of number of days, as per requirement, or click on Retain forever. You can define your default backup policy from the eDiscovery portal.
Steps to define a default backup policy:
-
Click Next, to choose the default retention period.
-
By default, the retention period is 365 days. You can also choose to Retain forever, if required. You can also define a specific number of days as the backup period, based on your requirements.

Once you define the retention period, you can go ahead and define the backup rules.
Note:
Enabling Retain forever will not delete backup emails and so, can cause the storage to run out over time.
Defining backup rule
Backup rules provide you with an option to keep a backup of spam emails along with the deleted emails, if required.
Steps to define a default backup rule:
-
Once you define the retention period, you can go ahead and define the Default backup rule.
-
You can decide whether to retain spam emails along with the other deleted emails or not.
-
In case you want to exclude spam emails from retention, in this section, uncheck the Backup spam emails also to avoid spam emails from your retention.
-
If you wish to change the default backup rule later, go to Settings and change.

As the next step, you need to select the users for whom the backup retention should be enabled.
Selecting user accounts
Once you define the backup period and backup rules, you will now select the users for whom the backup should begin. Click Enable Backup to start the retaining the deleted emails for the selected set of users.

You can click Select all users to enable retention for all the user accounts.
Once you enable the retention and define the backup policy, the emails that are deleted from the user accounts will be retained in the backup portal, based on the backup period. The spam emails that are auto deleted from the accounts will also be saved or skipped based on the backup rule set in the organization.
Using email backup
Once you are done onboarding email backup, you will be able to access all the features that the portal provides to manage your organization's data. Additionally, you can now also customize the portal settings apart from enabling/disabling users and creating new backup policies.
Recovery
When an email is accidentally deleted from the user mailbox, an administrator can help restore that email back to the user account by using the Recovery option from the backup storage.
Steps to recover an email from backup:

-
Enter conditional search or name to filter out an email from the user's mailbox.
-
Select either All user accounts or Specific user account, whichever is relevant to the case. Mention the User mailboxes in case you choose 'Specific user accounts'.
-
Include spam emails, if applicable.
-
Specify the Start and End dates for the search and mention the search criteria.
-
In the Condition query, provide the conditions based on which you want to define the custom policy for email retention from the granular options provided:Contains - contains text/ email address in the entire emailSubject - subject contains the selected termContent - email content containsFrom - from email address containsTo - To email address containsCc - Cc email address containsBcc - Bcc email address containsReply To - Reply to email address containsHas attachment - Only the emails with attachmentAttachment name - Attachment content containsAttachment content - Attachment content containsOnly outgoing emails - Include only outgoing emails
-
Click on Preview results if you wish to view the emails based on the above steps taken.
-
If the results match the emails that you need to recover, click on Recover and restore all the mails back to the mailbox.
Note:
When an email is restored back to the mailbox, the email will get deleted from the backup while a copy will be maintained in Archive, if eDiscovery is enabled.
Recovery History
All the recovery actions along with the details are listed chronologically under the Recovery History list. The Recovery History that is 90 days and older will be cleaned up automatically. However, the cleanup duration can be set by the admin under Settings tab.
Exports
Sometimes, instead of recovering the emails back to the accounts, the administrator can also export the data required. These exports will be scheduled and the administrators can download the exported files from the backup portal.
Steps to recover an email from backup:

-
Enter the name to filter out an email from the user's mailbox.
-
Select either All user accounts or Specific user account, whichever is relevant to the case. Mention the User mailboxes in case you choose 'Specific user accounts'.
-
Include spam emails, if applicable.
-
Specify the Start and End dates for the search and mention the search criteria.
-
In the Condition query, provide the conditions based on which you want to define the custom policy for email retention from the granular options provided:Contains - contains text/ email address in the entire emailSubject - subject contains the selected termContent - email content containsFrom - from email address containsTo - To email address containsCc - Cc email address containsBcc - Bcc email address containsReply To - Reply to email address containsHas attachment - Only the emails with attachmentAttachment name - Attachment content containsAttachment content - Attachment content containsOnly outgoing emails - Include only outgoing emails
-
Now, provide password in order to encrypt your data and secure it. Confirm the password.
-
Select the format you want to save the file as, i.e. ZIP or PST.
-
Click on Preview results if you wish to view the emails based on the above steps taken.
-
If the results match the emails that you need to export, click on Export or Export & Delete, whichever is applicable.
Note:
Choose Export & Delete option in order to create and maintain a copy of the old or unwanted backup files externally. This will create a ZIP or PST file of the emails that fall under the search criteria and remove the emails from the back up storage. Doing so, will not only keep your backup storage clean by retaining only those emails that you have segregated as per your requirement but also ease up the storage capacity.
Export and Delete is an irrevocable action which will delete the email from backup, so use it carefully.
Export History
All the export actions along with its current status, are listed chronologically under the Export History tab. Please note, it may take some time depending on the file size. Once the status shows completed, you can download the exported file by clicking on the given link. The Export History that is 90 days and older will be cleaned up automatically.
Export & Delete History
This tab lists the Export & Delete operations performed by the administrator along with the current status of the action. It may take some time to complete this action depending on the file size. Once the exported file is ready for download, the status will be shown as completed. Click on the file to view the details and the download link. The exported file will be cleaned up after 90 days and so, it is recommended to download the file within the said period.

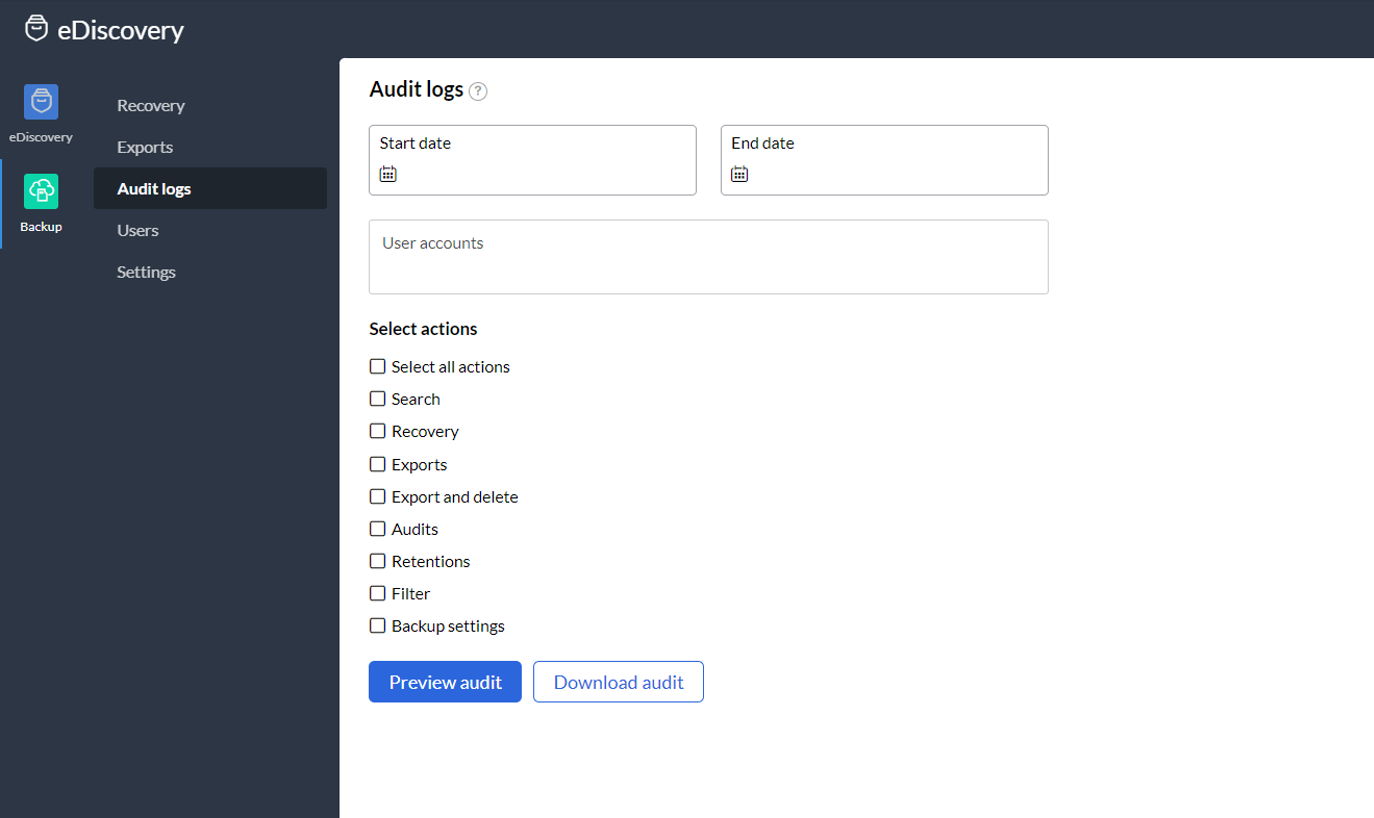
Audit logs
All the actions of the administrators in this portal will be recorded in the Audit logs section. All you need to do is specify the Start and the End dates and the User accounts for whom you wish to Preview or Download Audits. Select the actions as required.
Customizing backup settings
Enable / Disable backup
As an administrator, you can customize your Backup setting by clicking on the Settings tab under Backup in eDiscovery portal. This section allows you to enable or disable Backup for your organization. In case, you have already enabled Backup and later, due to some unforeseen reason, wish to disable the service, then older emails will be retained as per the existing retention policy. However, once the Backup is disabled, emails deleted from the user mailboxes will no longer be saved in the backup portal.
Auto-enable for new users
When Auto-enable for a new user is enabled under backup settings, this means, deleted emails from a new user account will be stored automatically in the backup storage. In case 'Auto-enable for new users' is disabled, the administrator can manually enable backup for the new users under the Users tab, whenever required.

Backup spam emails
As an administrator, you can also enable or disable (if enabled during onboarding phrase) backup spam emails along with the deleted emails under the Settings tab.
Recovery Cleanup
Administrators can set up duration in order to clear the recovery stats in the Backup.
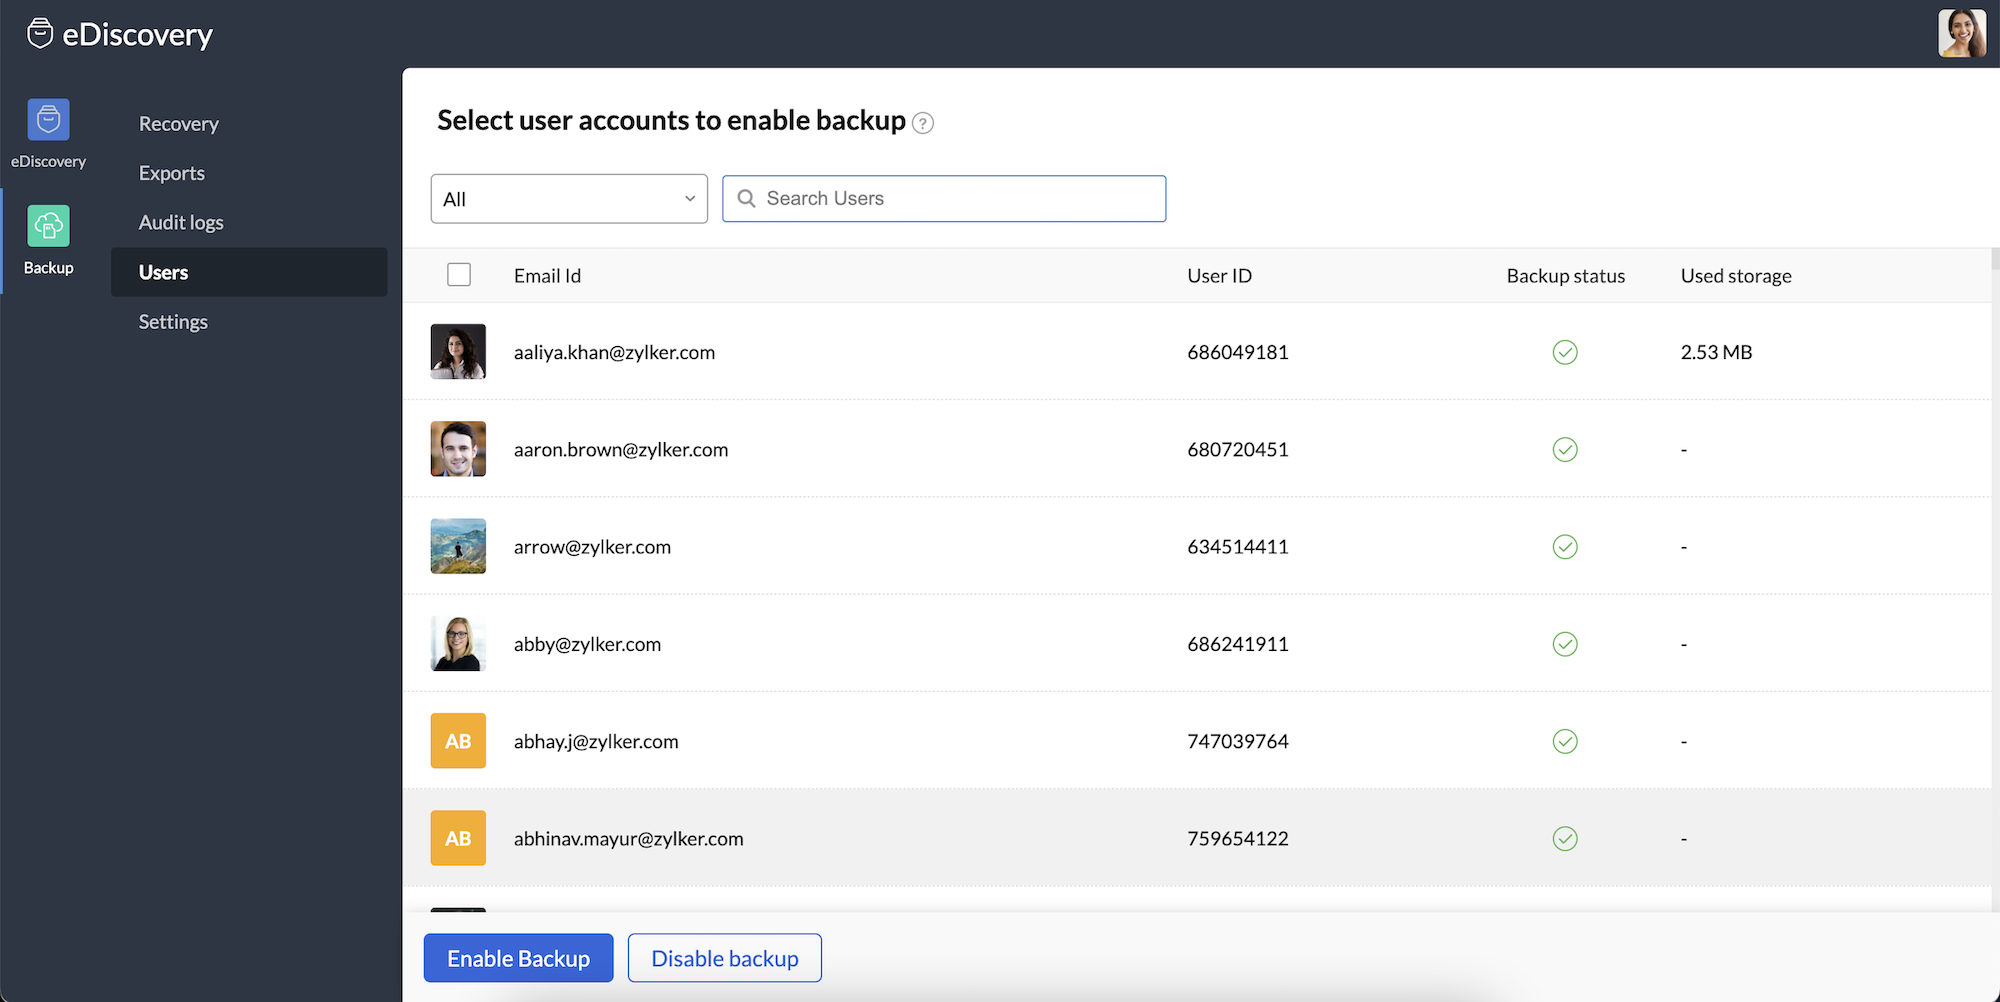
User accounts
The Users tab gives you an overall view of the organization's users and their Backup status (enabled / disabled) with the storage utilization by each user. As an administrator, you can also manually enable or disable the Backup service for users joined newly or for whom the service was already enabled. This view also provides details about the quantum of storage used by each user for their email backup.
Note:
The backup storage is included in the user's total storage allocation.
Manage Backup Storage
The user's mailbox, eDiscovery and Backup share the storage allocated to a user. If you no longer require certain emails in your Backup, you can remove those in order to free-up the user's storage. Follow these steps to remove emails from backup:
-
Login to Zoho Mail Admin Console and select eDiscovery from the left pane.
-
Select Backup and click Exports.
-
Enter the values in the below fields in order to free-up the storage space:Name for the ExportSelect either All user accounts or Specific user accountsAdd the User mailboxes if you chose the Specific user accounts optionIf required, select Include spam emailsChoose the time period for which you want to remove emails from backupSelect a condition for the query and specify the search criteriaEnter the encryption passwordSelect ZIP or PST under the export file type.
-
After you complete the above selections, click Export & Delete.
-
Click Ok in the confirmation dialog that appears.
-
Navigate to the Export And Deletes tab to view the export status.
-
Upon export completion, select the export name and click Files in Export preview.
-
Click Download file to save the zip file.


Based on your selection, the emails are now removed from Backup, thereby increasing the user's storage. To view the current storage space status refer to the User accounts section. Refer to the Export & Delete History section for more details.
Was this article helpful?
Subscribe now & Get the latest updates
©2022, F-Grade GlobalServices Pvt Ltd. All right reserved.